How to Upload Fl Studio Songs to Youtube
And then you want to brand a beat in FL Studio? Below is a no-nonsense guide to making your first beat out, from a beginners perspective, to simplify the whole procedure for you lot.
The video version…
In the video below we'll run through a beginners tutorial to making beats. You tin either watch this video, or keep scrolling to read more!
Making a vanquish in FL Studio: Earlier you begin
For a beginner, FL Studio can seem very daunting and sometimes overwhelming. Nosotros've all been there.
Just FL Studio is an unbelievably powerful program, and when used correctly, can exist used to make whatever audio or track you can imagine.
In order to begin making a beat out in FL Studio, you must have the following:
one. A total (or even the trial version) of FL Studio
The producer and signature bundles of FL Studio tin go quite pricey, and for a beginner this can exist very off-putting.
The virtually basic version of FL Studio, "Fruity Edition" definitely has everything y'all need to create incredible beats. So you aren't prepare to pull the trigger on the more than expensive versions, this version will definitely give you what you need in the early on days of your music production journey.
Here are thepricing options for Fl Studio:
| FL Studio Edition | Price |
|---|---|
| Fruity Edition: | $99 |
| Producer Edition: | $199 |
| Signature Package: | $299 |
| All Plugins Bundle: | $899 |
FL Studio likewise has a free trial version of the product, where you can use almost all the plugins bachelor, even so y'all can't re-open up a file once it's saved.
Click here to download FL Studio's free trial.
2. A very basic understanding of the FL Studio interface
This seems obvious, but don't bound before yous tin can walk. If you effort and skip the learning curve and beginning making beats before you fifty-fifty understand the first thing near FL Studio's interface, you'll probably end up dislocated and unmotivated.
Make sure yous understand the very basic functions of the 5 main windows of FL Studio – the browser, the channel rack, the piano roll, the playlist and the mixer.
This video below outlines the basics of FL Studio xx you NEED TO KNOW before you start making beats.
iii. Some samples/sounds to play around with.
To make a beat in FL Studio, you're going to demand a pick of drums and other samples to play around with.
You're in the early days of product, so I'm assuming you don't want to exist forking out a huge amount of money, if whatsoever, for samples correct at present.
Hither is our HUGE listing of FREE sample packs across a wide range of genres.
Or check out our guides to the best sample packs for genres such as Lofi, Hip Hop, House, Trap, etc.
So now you should have a copy of FL Studio, a few samples/sounds of your own, and a basic understanding of the program.
Now it'south time to get creative, and larn how to make a beat in FL Studio.
How to make a beat in FL Studio (Tutorial)
Hither are the main steps to making a beat (FL Studio):
1. Creating a drum pattern in the channel rack
2. Adding a VST instrument sequence
three. Adding other elements (percussion)
four. Edifice and structuring the beat in the playlist view
five. Automation
6. Mixing/adding furnishings
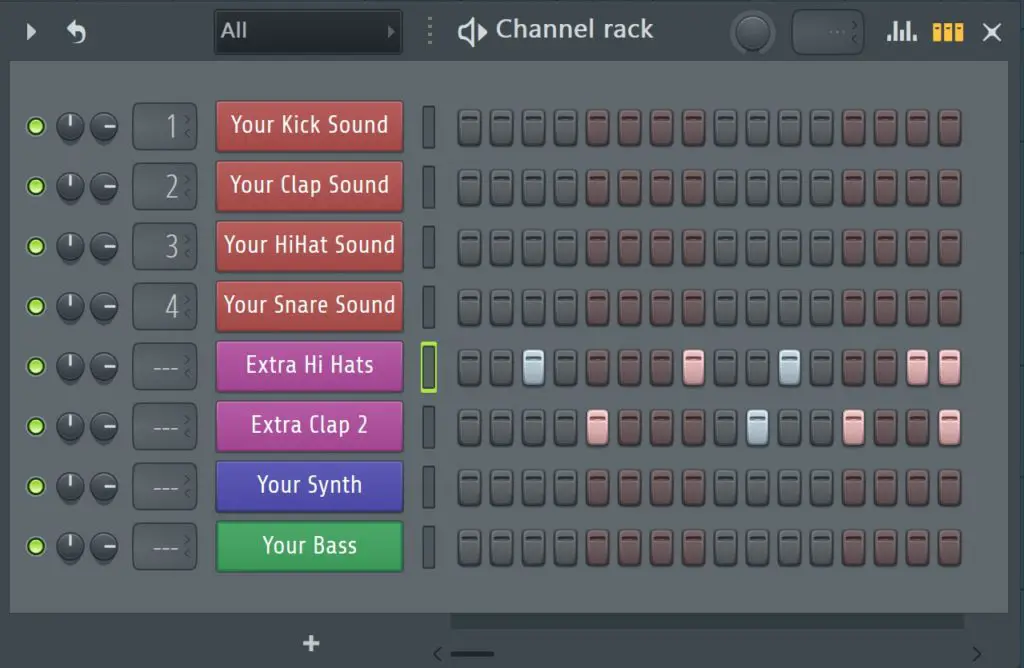
i. Creating a pulsate pattern in the channel rack
The first footstep to making a vanquish in FL Studio is to create a simple drum blueprint that will be the courage of your beat.
The default pulsate sounds that come with FL Studio are pretty terrible, and you definitely want your own drum sounds to create the shell.
Click here for a peachy resource for gratis sample packs, or click here for our guide to the best sample packs for Lofi, Hip Hop, Trap, House + more.
Now you've got your sounds, it'southward time to import them into FL Studio.
Importing your sample packs into FL Studio
Open FL Studio, go toOptions in the pinnacle menu, then toFile Settings, then underScan Extra Search Function, click a binder down the left hand side to add a folder to the browser.
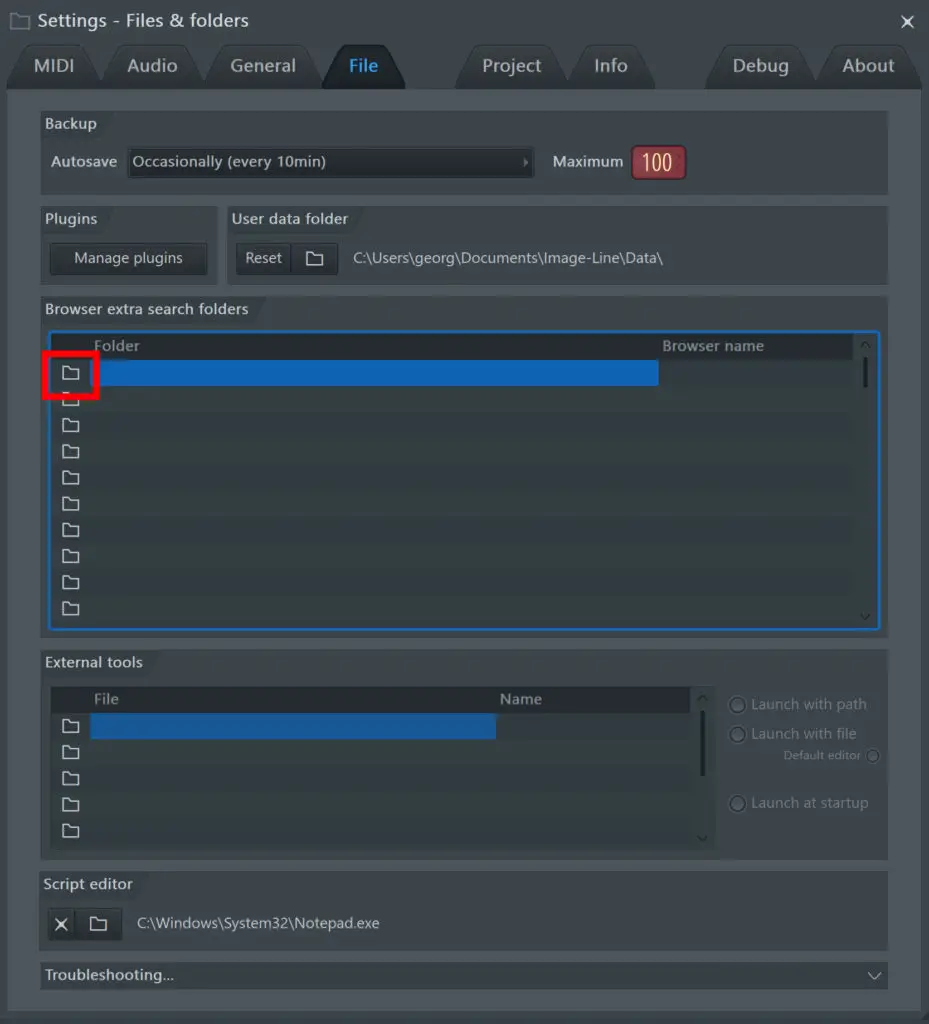
Once yous've chosen a folder, clickOK, and if you desire, you tin rename the folder with FL Studio past clicking the proper name in theBrowser Name column on the right. You should now see your called folder within the browser console.
Annotation: Sometimes the folder won't automatically rename itself within the browser. To fix this simply clickre-read (the pointer side by side to the magnifying glass at the top of the browser, and your binder name should update.
How do I become sounds from the browser into my track?
To import a specific drum sound into the projection, simply left click on the desired sound file in the browser, and drag it into thechannel rack. The best affair to do is drag and drop the files just beneath the lesser sound in the aqueduct rack, as dropping it on top of some other file within the rack will replace it.
For the side by side step, add a kick, snare, clap and a hi lid that take your fancy. You can add more than percussion elements after, for at present you but need to create a bones drum crush.
Creating a drum pattern
This is where the fun really begins. FL Studio's iconic step sequencer is 1 of the easiest ways to create a pulsate pattern in whatever DAW. Easily down.
To add a step or drum "event", left click on any of the step buttons and they will light upward, and to delete steps, just correct click your highlighted pace. You can too drag left or right click to select multiple steps within a channel at one time.
In the step sequencer, play around with creating some simple pulsate patterns.
If you're a bit lost, try recreating one of these drum patterns:
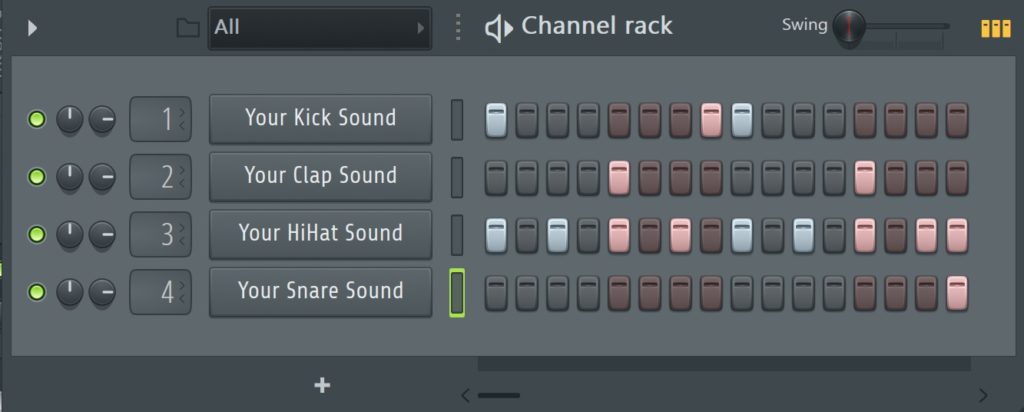
Basic hip hop shell
Recommended tempo: 80-xc bpm
Basic trap trounce
Recommended tempo: 70 bpm
Basic house beat
Recommended tempo: 125-130 bpm
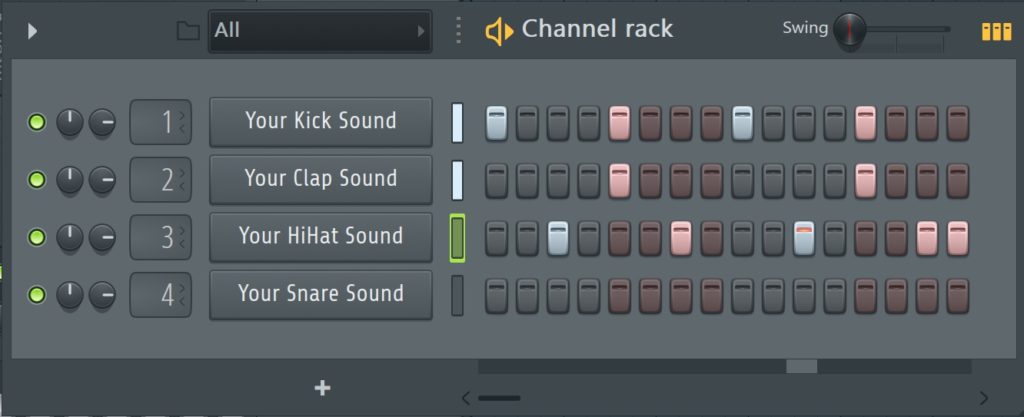
Make certain you rename and color each drum rails to continue your beat organised. To do this, simply correct-click a audio, click "Rename, Color, and Icon…".
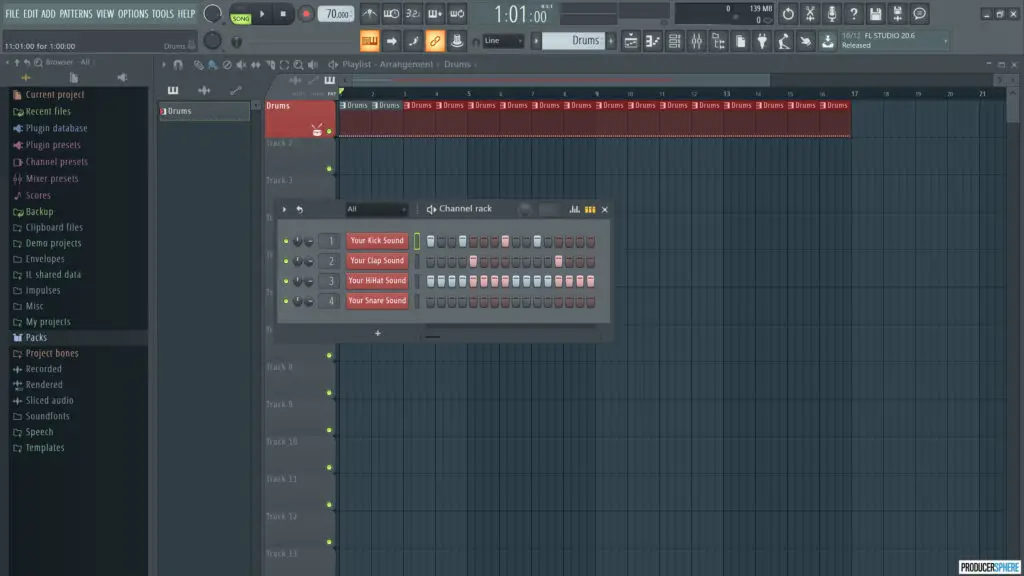
Adding the drum pattern to your track
To add your pattern to your track, just left click inside the playlist section, and your pattern will appear.
Unlike near all other DAWs, you lot tin can identify any pattern anywhere within the playlist, and each pattern is not limited to its own rail row.
To keep things organized, correct click on the runway name, and select "Rename, colour and icon…" and name it "Drums". It'south always easier to produce total, circuitous tracks when sounds are kept within their respective tracks.
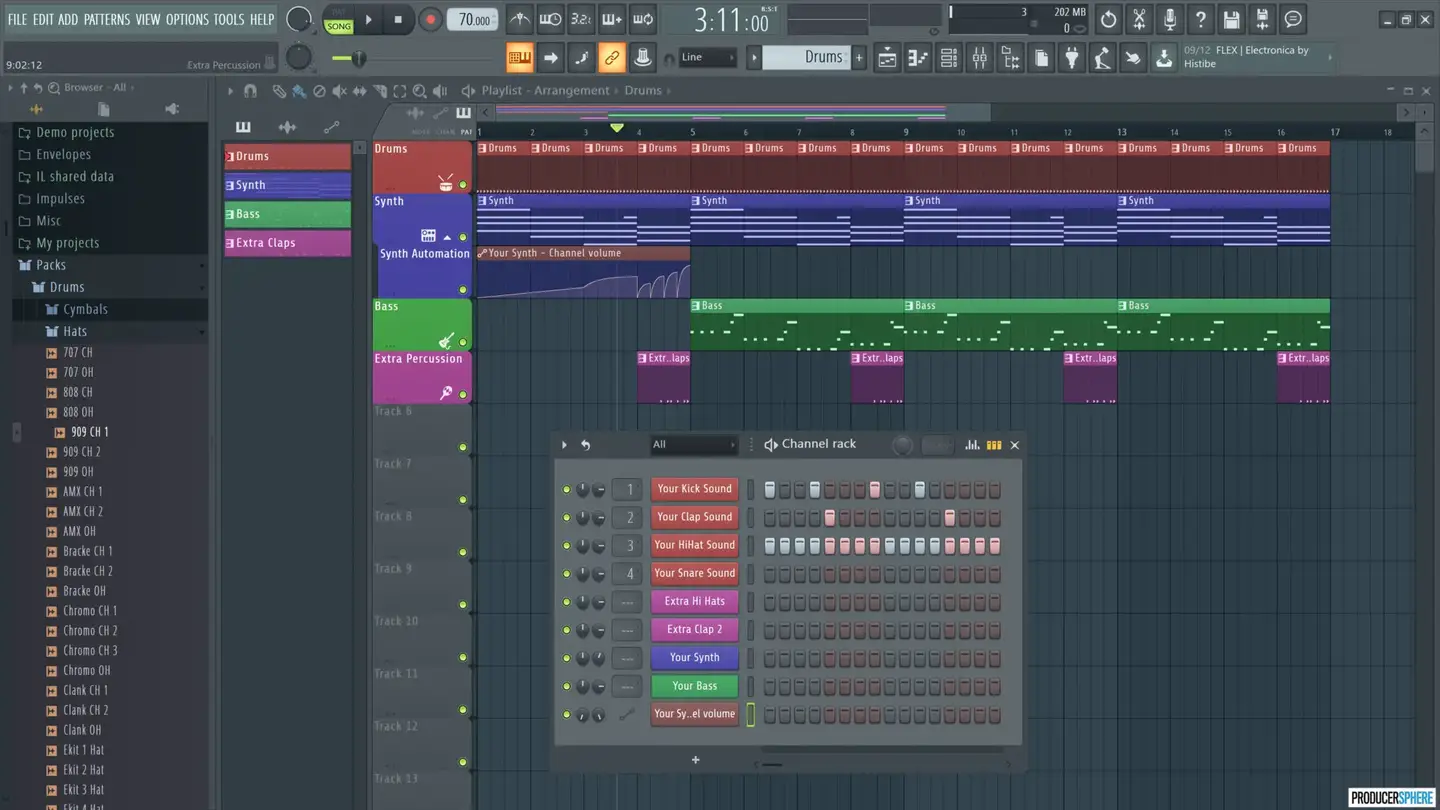
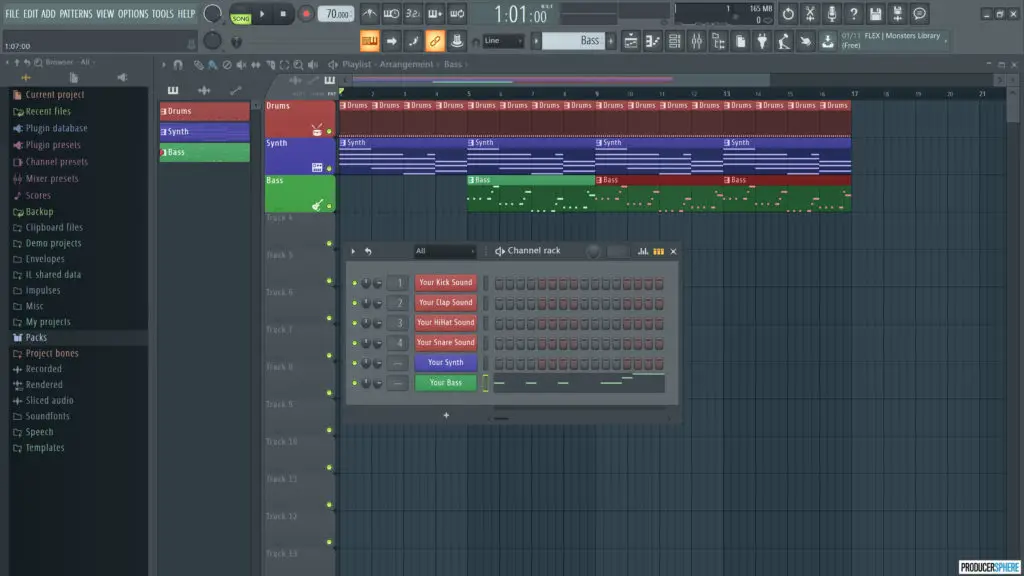
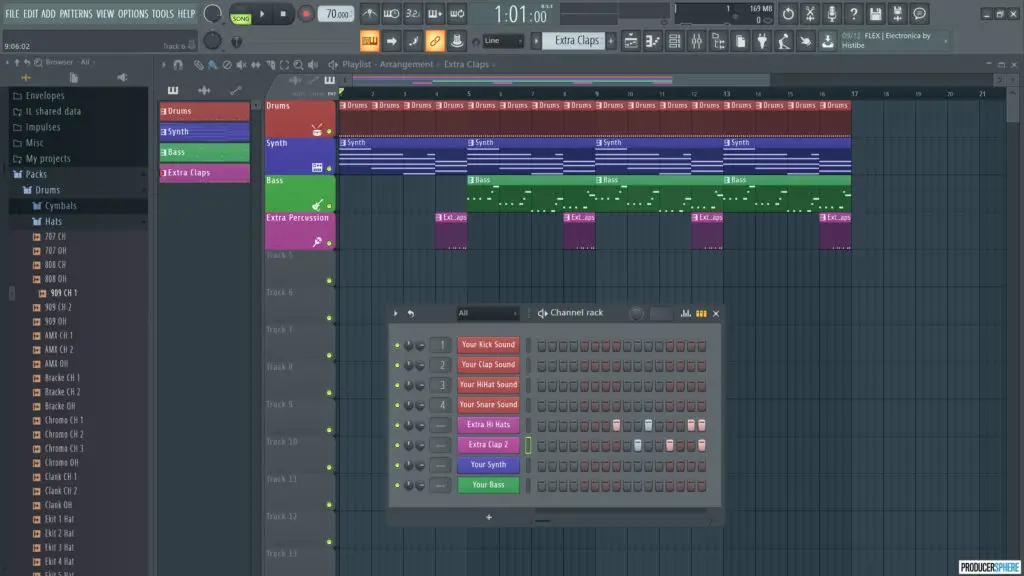
Go ahead and add 4, 8 or 16 bars of the pulsate pattern to your playlist. Your screen should now look something similar this:
2. Calculation a VST instrument sequence
Then y'all have your basic drum vanquish, and accept sequenced it into the playlist view…
Now it's time to add together your starting time instrumental sound or sample. The main way to do this would be to add together a VST musical instrument and plan a melody or chord progression using the piano scroll, or using a MIDI controller/keyboard.
There are other ways of adding your start instrumental sound, such every bit sampling, speeding upwards/slowing downwardly and looping other songs or "sampling". For the sake of keeping things elementary, I'll but focus on calculation a MIDI design using a VST musical instrument.
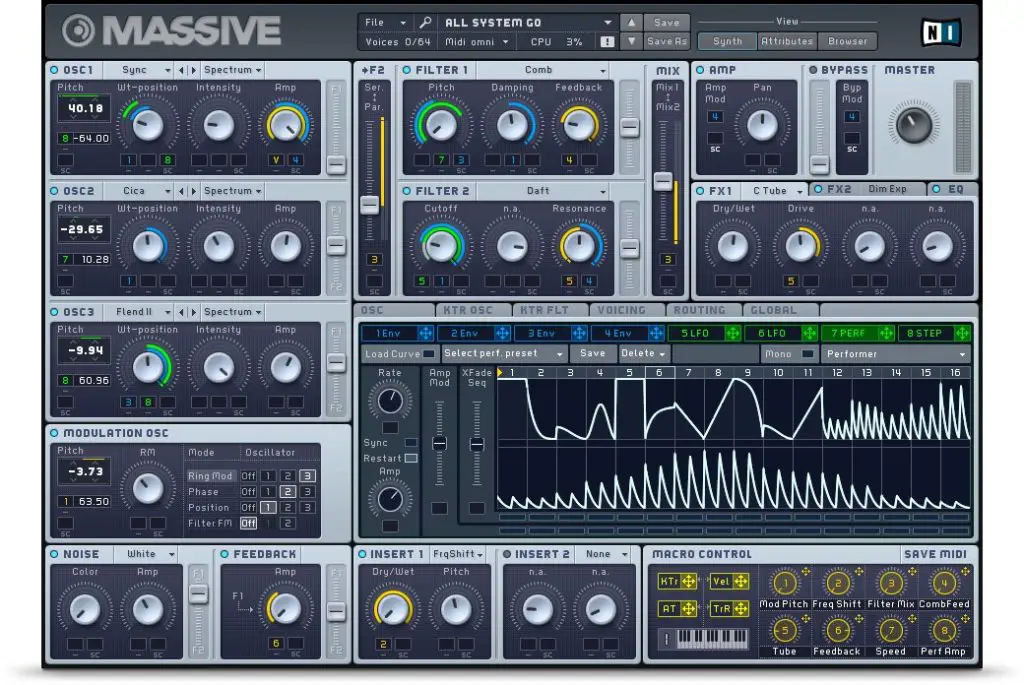
What is a VST instrument?
VST Instruments generate audio and act every bit software-based instruments. They often emulate recognizable sounds of famous synthesizers and other instruments. Popular VST instruments include Serum, Massive, FM8, Sylenth i and Absynth.
These programs can seem daunting to a beginner, as many VST interfaces announced very complex and overwhelming.
And then for now, instead of creating a new sound with one of these programs, nosotros'll but use 1 of the thousands of presets bachelor for FL Studios instruments.
Click hither for our guide to the best VST plugins for beginners.

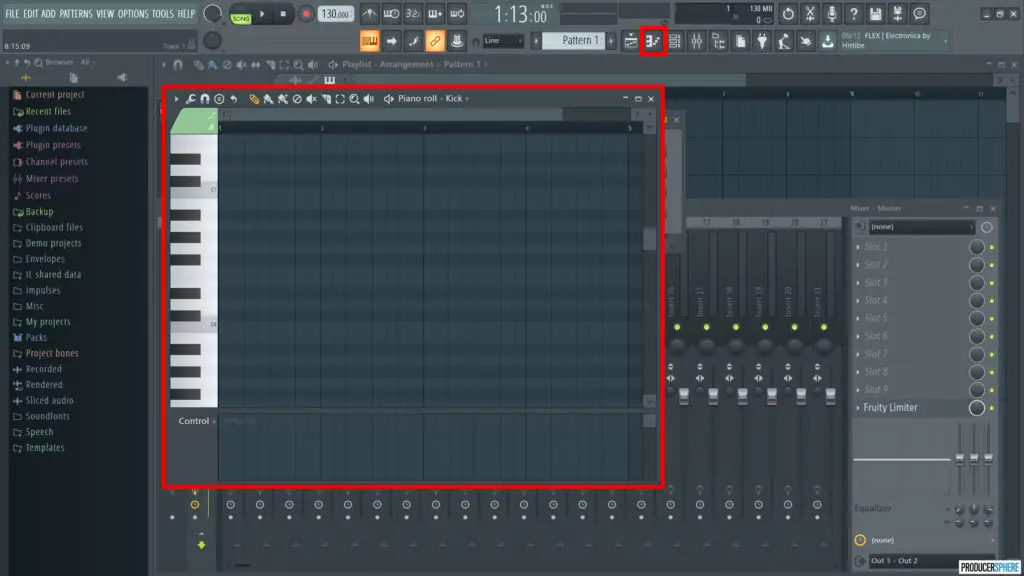
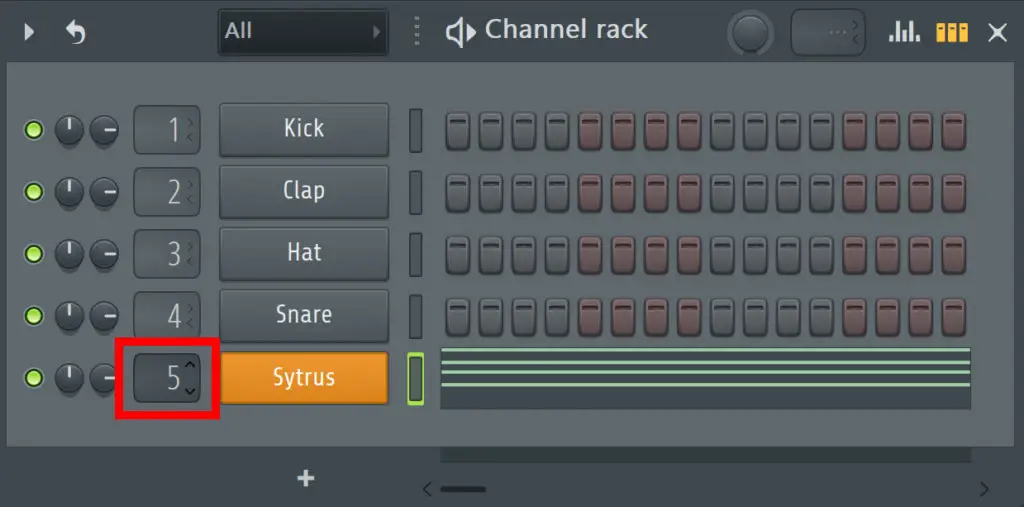
Creating a new pattern for your VST instrument
Before you begin creating MIDI patterns for your VST instrument, brand certain yous've selected a new pattern, so your drums and musical instrument patterns are split.
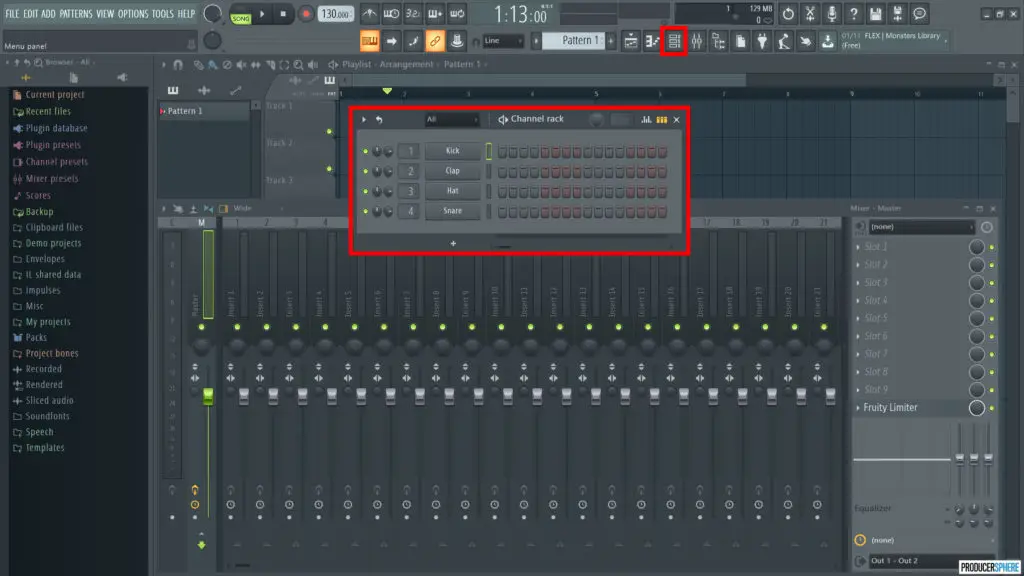
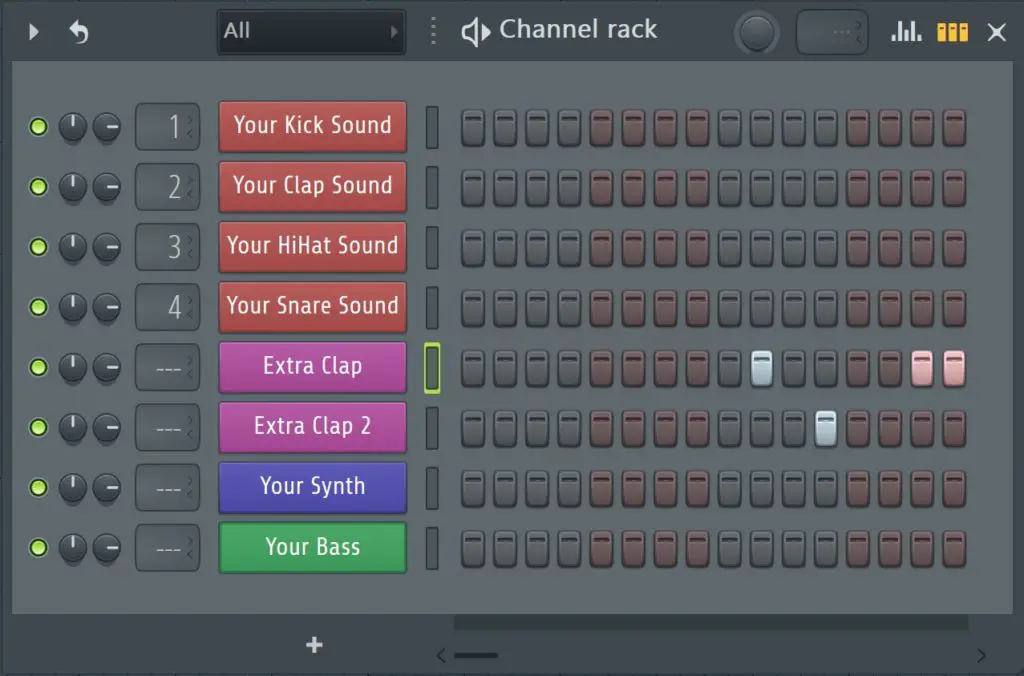
To practise this, navigate to the pattern selector in the meridian card and select the plus button to create a new design (see above). This creates a bare channel rack inside which you can create your new instrumental pattern.

How to add a VST instrument to your channel rack
To add a VST instrument to your track, simply click the plus button at the lesser of the channel rack (come across above), and choose from the listing.
Once again, for simplicity, I will be adding Sytrus, a smashing FL Studio plugin with lots of fantastic presets.
If you're unsure about how to install and add together your own VST plugins to FL Studio, here is our quick, easy guide.
Creating a MIDI sequence for your VST instrument
Y'all tin can create a MIDI sequence in the piano roll for your chosen instrument.
The piano whorl is where yous can compose, slice and edit MIDI notes of a selected channel with an incredible amount of detail and precision.
It is incredibly helpful for case, to tweak a MIDI keyboard performance or lengthen certain notes within a sequence.
To open to piano scroll for a called channel, right click on the channel proper name and selectPiano Roll.
Have a play around with the piano roll, creating chord sequences and melodies for different VST instrument presets and sounds.
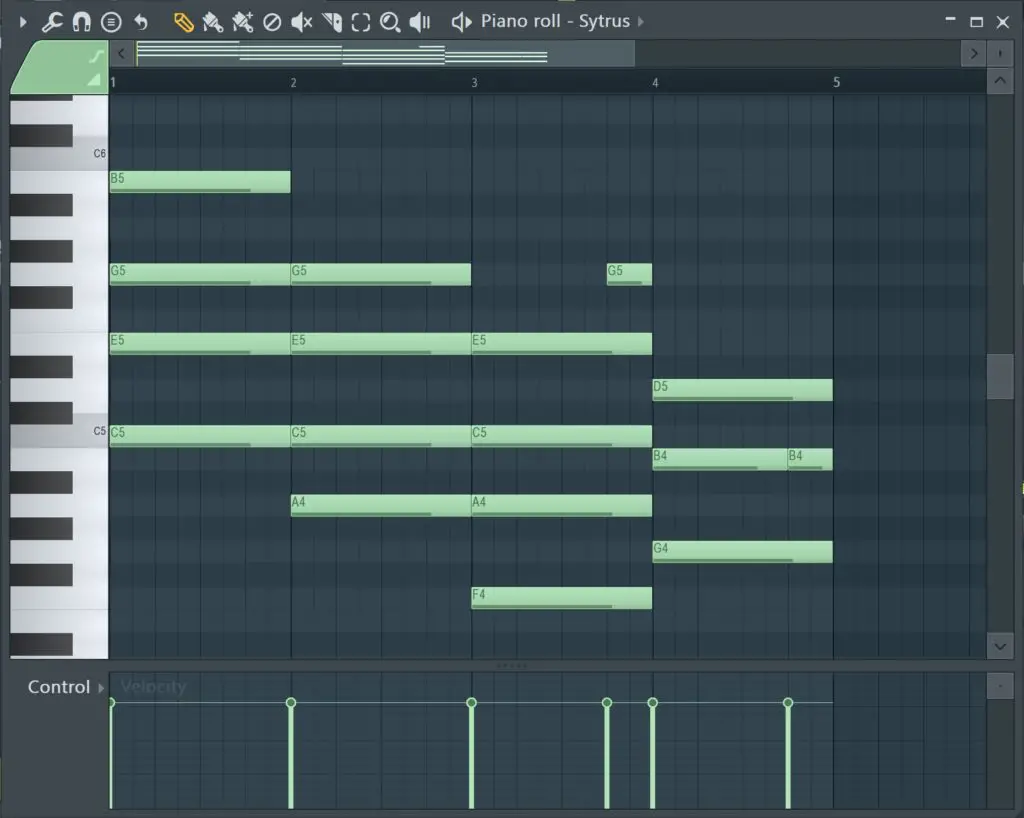
Try recreating these jazzy chords within your piano roll if y'all're stuck for ideas.
Click here for our full guide to FL Studio, including an in-depth look at the pianoforte roll editing features.
Adding your VST musical instrument pattern to your track
To add your design to your track, simply left click inside the playlist department, and your pattern will appear.
Add together it below the drum design you added before, and call up to color and organise the rail.
Repeat this footstep every bit many times every bit you desire. This manner you can add and layer as many instruments as you like: Sub-bass, bass, synths, keys, pianos, strings, pads, stabs, etc.
Here'southward an example of what your screen may look like now:
3. Calculation other elements (percussion/vocal FX etc)
Now you accept the skeleton of your beat (a drum beat and a musical instrument sequence), it's fourth dimension to add some additional elements to breathe some life into your beat out.
Actress percussive or FX element are a great way to brand your rails stand out from other, more simplistic beats.
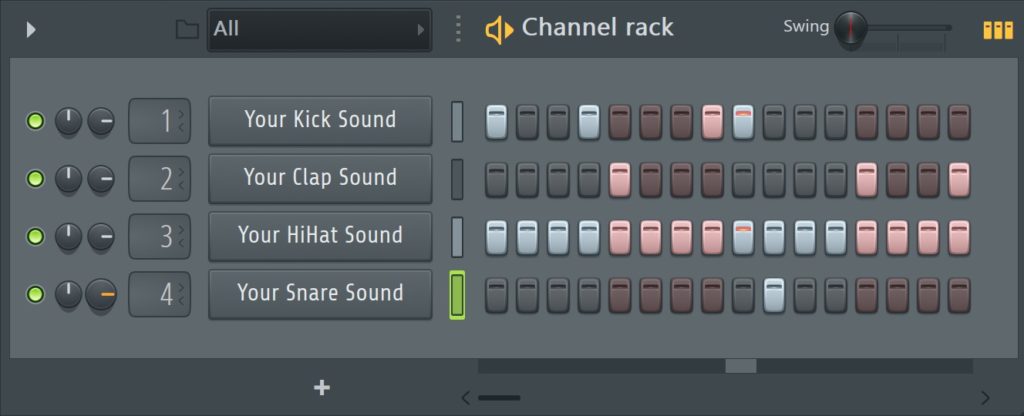
Adding extra percussion
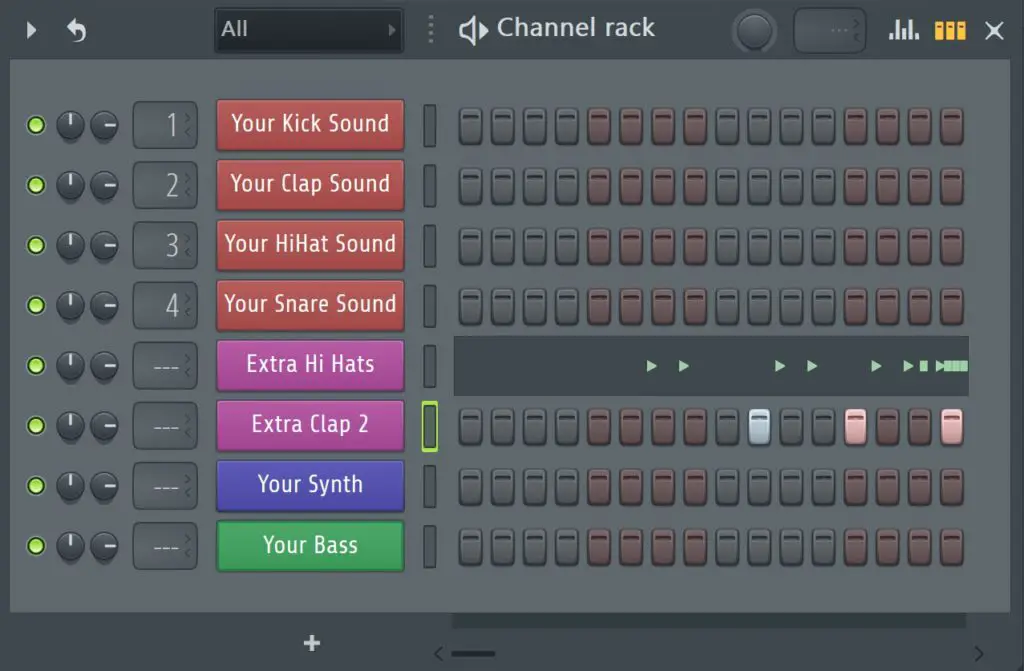
Calculation actress percussive elements is a very like process to creating your chief pulsate beat.
Again, using the pace sequencer, create a blueprint of percussive elements to add to your track. This can come in the form of snare/tom fills, extra hi hats to evolve the drums in a sure section of a runway and more.
A few ideas could exist:
Hip hop – clap-fill for the 8th bar
Recommended tempo: 80-90bpm
Trap – hi hat roll and percussion make full
Recommended tempo: 70bpm
Note: To add percussion hits with more than precision, open the piano roll for that sound.
Firm – extra howdy hat design for vanquish development
Recommended tempo: 125-130bpm
Add your extra percussion to your runway in the relevant places (i.eastward for a drum fill, add it to each 4th, eighth or 16th bar.
Once again, remembering to organise it finer, your screen should now look a footling something like this.
4. Building and structuring your track
So, you lot have a basic understanding of how to add unlike drums beats, percussive patterns and multiple instruments to the playlist view.
Now it'southward time to build and sequence your tracks from a layered loop to an full, evolving track.
If you're new to the playlist view, or want more information on how to edit, slice and suit patterns within this interface, check out our FL Studio guide which volition have you through this.
This step is very important for building a song, so elements are introduced throughout a track. This creates a more professional sounding song as opposed to a stand up alone loop or thought.
If you're creating instrumental beats, accept a look at like tracks in the same genre to run into how they are structured. For example:
Lofi hip hop beats are normally only nearly 2 minutes long, without as well much beat evolution, just include sections where drums driblet out, or a filter is added, and and then they come up back in for effect.
Full business firm rails mixes are often 5-7 minutes long, with lots of beat evolution, and commonly start with a four-on-the-flooring kick pattern only.
If you're just starting out, don't try and re-invent the wheel. Know your genre, and once y'all've had some practice, yous can start getting experimental.
5. Automation
If you're new to music production, y'all may non take heard of automation. Merely in order to create cracking, professional person quality tracks, y'all demand to learn what automation is and how to utilize it.
What is automation?
To put information technology simply, track automation is a way of "automating" a specific parameter, such equally book, pan, reverb etc, and so that the parameter changes as your track plays.
A few examples would be: slowly fading in a pad over the course of 4 bars, sidechaining, and adding more reverb to a sound during a certain section of your runway.

How do I add together automation?
To add automation, but correct-click on a parameter in FL Studio such equally track volume, and select "Create Automation Clip". This will create a track-length automation prune in a free playlist track.
Seems easy? Equally with most things in life, information technology's not that simple. There are a few extra things you have to consider while adding automation.
Earlier adding automation clips…
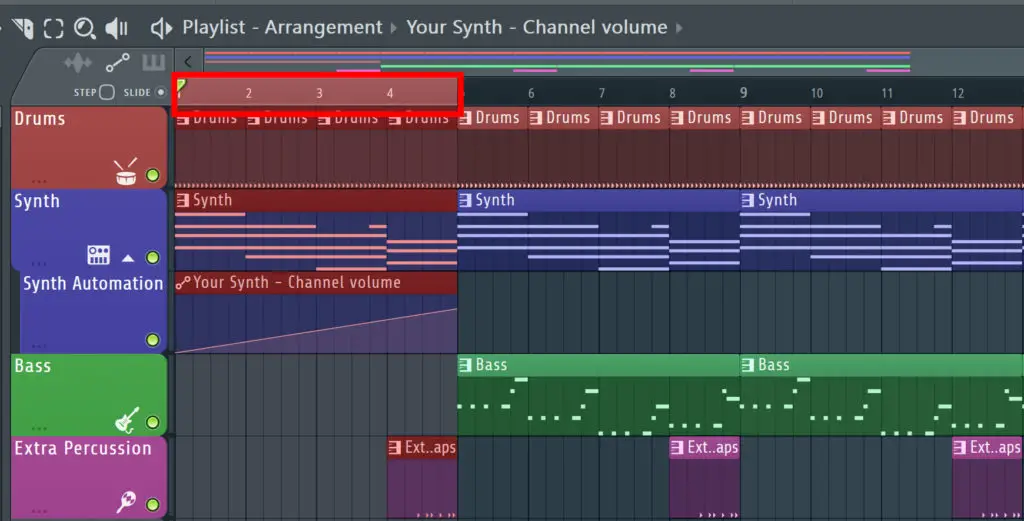
Always select the department of the rails you'd like to add the automation prune to start, before adding the automation clip.
Adding rail-length automation clips for each parameter can become very messy.
To select a section of the track, double click/Ctr + click and elevate along the bar merely above the playlist where the bar number is displayed (see image to a higher place). This will highlight the selected section in cherry.
At present, when you lot add your automation prune, information technology will only be added to this section.

Editing an automation clip
To edit an automation prune, simply correct-click within the clip, and new points volition exist created in the prune, which you tin and so left-click to drag anywhere you lot'd like.
Useful tip #one: If you lot left-click and hold in the line between two created points and drag, this allows you lot to fine-tune the curve between two points.
Useful tip #2: By correct clicking on any automation indicate, yous can change it's "mode", for example creating a "pulse" or "smooth stairs" consequence. This allows for a huge amount of sonic inventiveness.
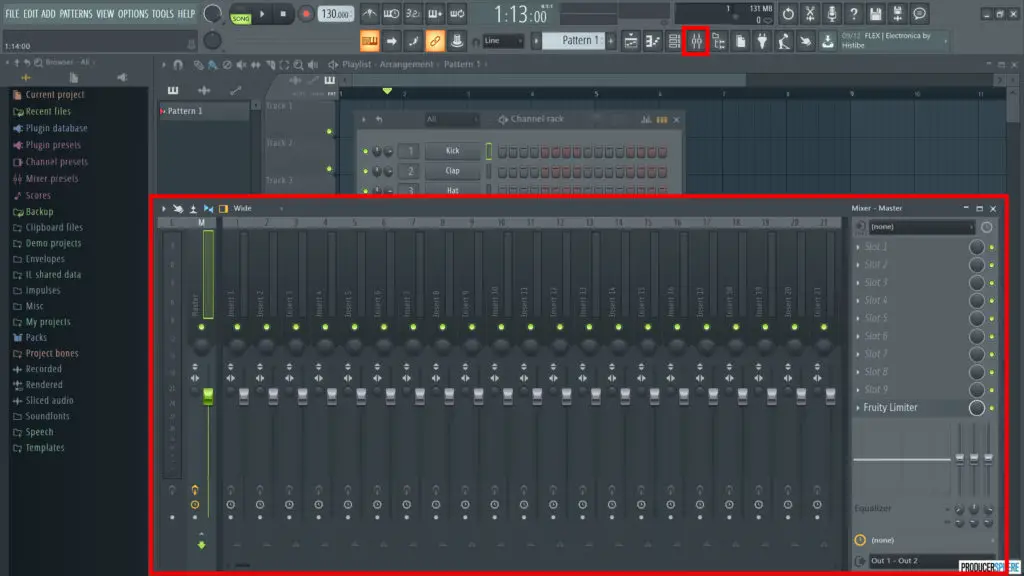
half-dozen. Mixing
Mixing a runway tin be a very in-depth, complex procedure, especially for big, layered mixes. If you lot're a beginner to the mixer in FL Studio, all yous really need to focus on a basic track levels, and adding FX.
The mixer is where yous'll mix your song, focusing more on sound design, effect processing and fine-tuning your tracks. You tin add effects such equally reverb, delay, compression and many, many other audio effects to your mixer channels.
Using this mixer finer can completely transform your songs into professional-sounding masterpieces.
Sending sounds or instruments to mixer channels
To send a specific sound to a specific mixer aqueduct, left click and drag the numerical value to the left of the sounds name within the channel rack to your called value. This will send your audio or instrument to the corresponding mixer channel, in which you can now add effects or change certain parameters.
Runway levels
You'll notice the far left mixer channel is yourmain channel, which allows y'all to edit the overall pan, book and other functions of the entire track.
Focusing on one private mixer aqueduct forth the mixer window, you lot'll see multiple buttons and a large fader command for each mixer aqueduct. For a more than complete guide to these controls and how to use the mixer, click here.
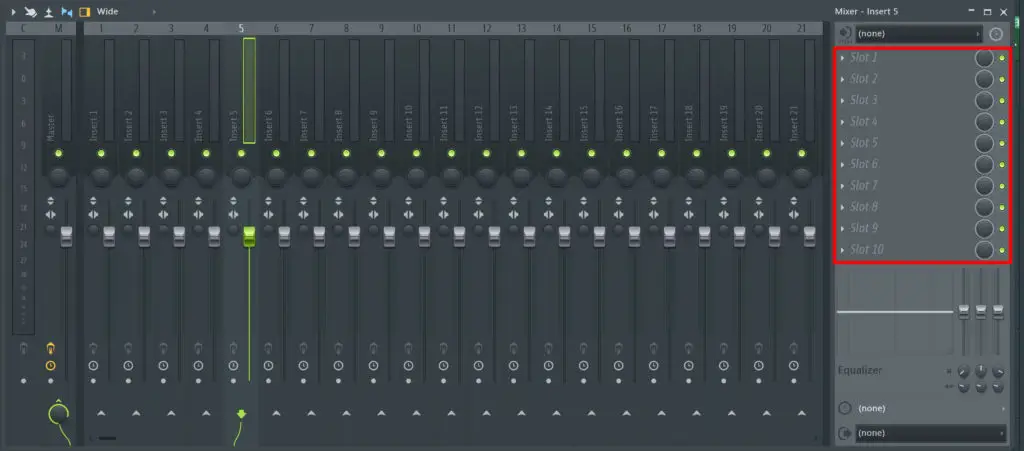
Calculation furnishings to a mixer channel
On the right mitt side of the mixer channel, you'll encounter x consequence slots. By selecting i of these slots, and choosing an effect, information technology will add together the selected effect to your mixer channel.
There are so many effects plugins included with FL Studio, and thousands more available online.
Here is an overview of the best effects to play around with for beginners (all included with FL Studio).
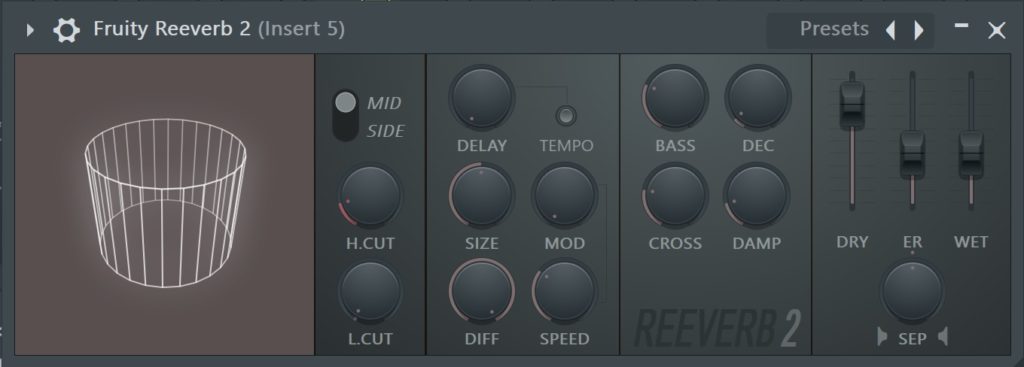
Fruity Reeverb 2: This is a incredibly high quality reverb plugin that honestly sounds unreal straight out the box.
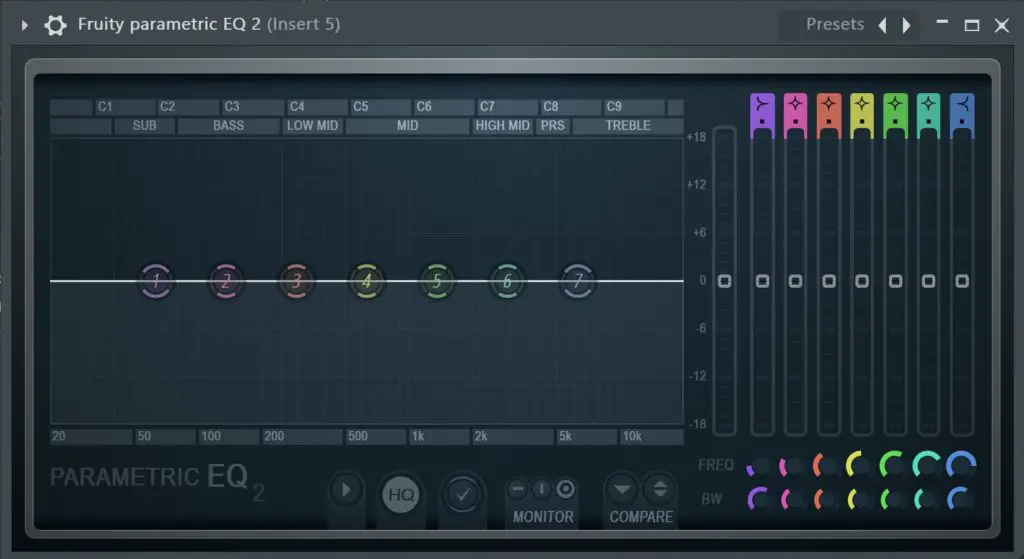
Fruity Parametric EQ ii: My favourite EQ plugin, menstruum. Peradventure it's bias every bit I've used information technology for so long, and then it'due south my favourite plugin for fine-tuning and automating EQ.
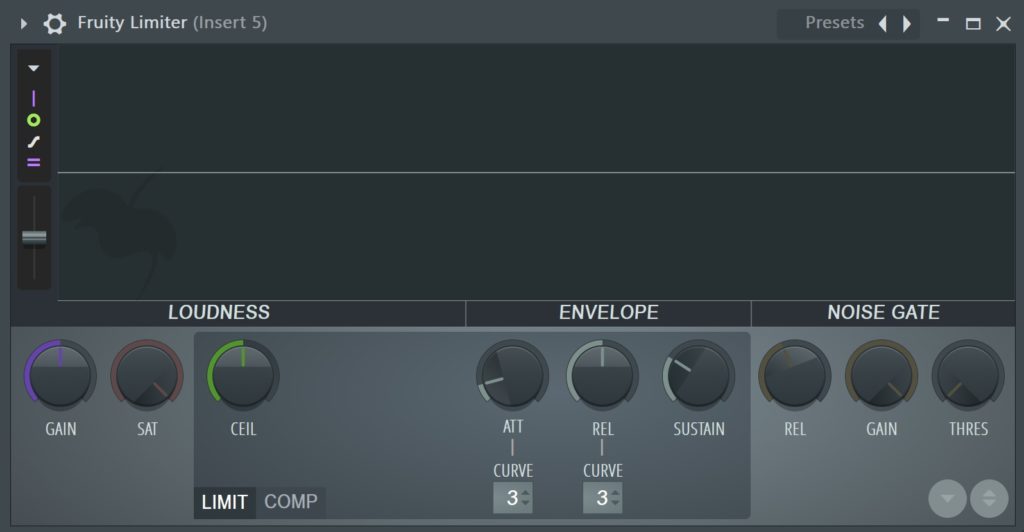
Fruity Limiter: A fantastic limiter for limiting and compressing sounds. In the pinch style, it visualises the sound yous're compressing every bit it's being played, which is a very useful tool for getting your compression levels right.
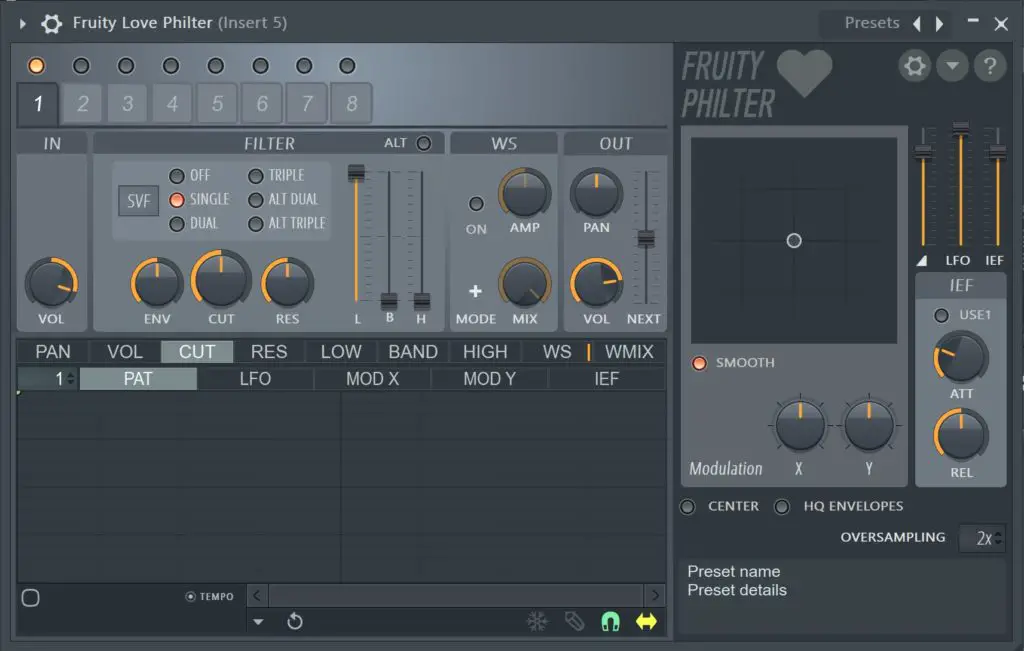
Fruity Love Philter: A versatile, powerful tool for calculation filters and modulating furnishings.
Now you lot tin can add multiple effects to your tracks, add automation clips for the actual effects, sequence your patterns and structure your track into a fully fledged song.
To conclude…
And there you have it, a basic guide to making a beat out in FL Studio.
You're either feeling one of two things correct now: creatively inspired, or completely confused.
If you're feeling inspired and gear up to create, I have nothing more to offer you. Go to work and create some astonishing tunes.
If you're feeling confused and overwhelmed by all this information, don't worry. It took me forever to understand FL Studio, and even longer to create something half decent.
Continue practising, and exercise your inquiry. There are so many guides and Youtube videos available to show you how to utilise this incredible plan.
Be prepared to create some terrible music, because eventually you'll actually create something worthwhile, and that is the all-time feeling in the globe.
johnsonbetteramer.blogspot.com
Source: https://www.producersphere.com/make-a-beat-fl-studio/
ارسال یک نظر for "How to Upload Fl Studio Songs to Youtube"